Example Page
While it is always preferable to design accessible websites from the start, there are also ways to repair existing websites for increased accessibility. We used the Babies R Us Catalogue web page to illustrate how to repair a website for increased accessibility.
The free diagnostic software tool APrompt was used to diagnosis areas in need of repair on the Babies R Us Catalogue web page.
- Selecting a Web Page to Test
- List of Items in Need of Repair
- Repairing Color Contrast
- Repairing Flickering Objects
- Repairing Missing Alternative Text
- Repairing Missing Longdesc Attributes
- Naming Links Correctly
- Conducting Manual Repairs
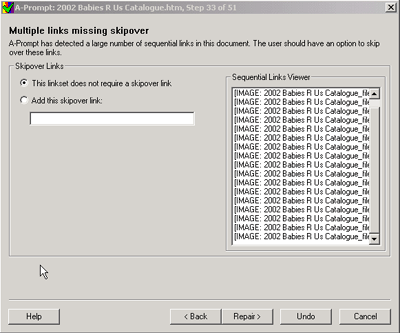
- Providing Skipover Options
- Babies R Us Catalogue Web Page After Repairs
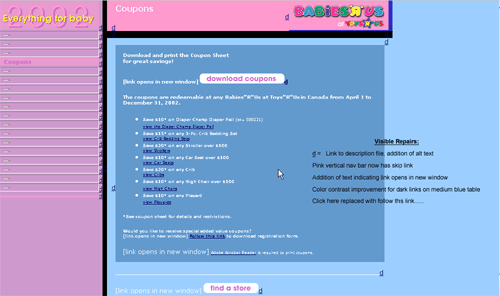
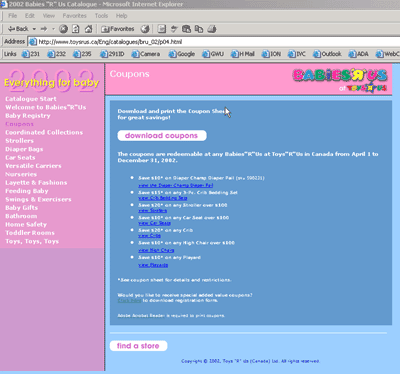
We chose the Babies R Us Catalogue web page. This is what the web page looked like before the suggested repairs were made.
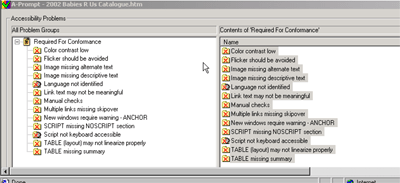
Below is an example of the accessibility check for the Babies R Us Catalogue page website. The checked items in the columns illustrate areas on the website that need repair to be accessible. In total 70 areas were identified for repair.
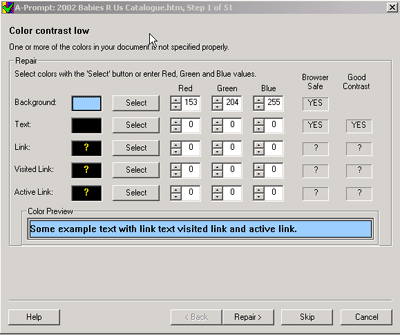
Here is an example of how to change the color contrast on the web page. In this case, the dark blue links on the medium blue background were changed.
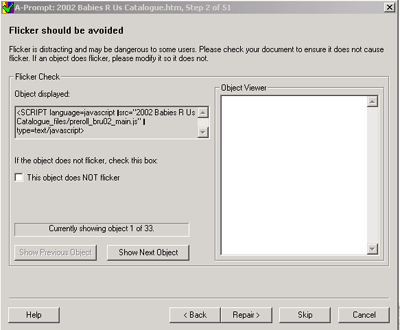
Below is an example of how to change the html code on the Babies R Us Catalog web page so that the objects don't flicker. To complete the above step, select "Show Next Object" and select "Repair". The Babies R Us required 33 of these repairs.
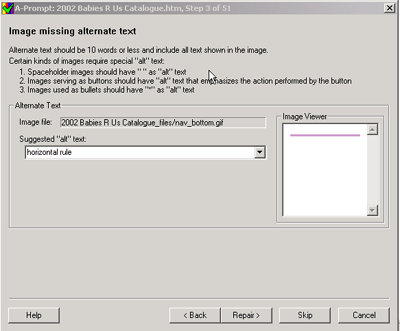
Alternative text was missing for several graphics. Below is an example of how to repair instances where alternative text is missing by including alternate text for graphics.
Several images did not have long descriptions. Below is an example of how to use the longdesc attribute and the descriptive link (d-link) to add descriptive text to elaborate images.

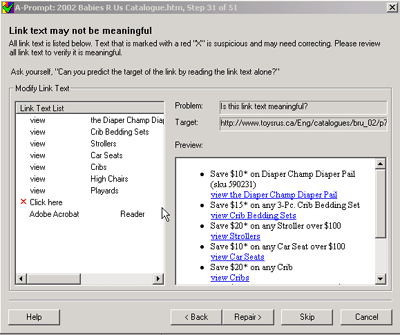
Titling a link "Click here" doesn't provide enough information for the user. Below are examples of how to correctly name links.
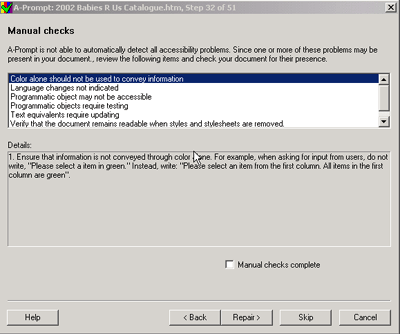
This step allows you to conduct manual repairs. This screen allows you to check your page for listed concerns which may or may not be a problem. Each time you highlight a concern in the window, an explanation is given in the "Details" area.
When a document has a large number of sequential links a skipover option should be provided. Below is an example of how to provide the "skipover" option to the user.
Below is an image of the Babies R Us Catalog web page after the suggested repairs have been made.